Hello Everyone!
I’m back after a prolonged holiday break. Okay, so lets walk through the creation of a rather large maze (using 18 x 24 sketch paper).

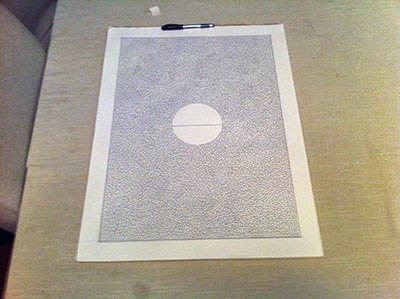
The first thing I do is make a border. To do this I simply lay a wood yard stick down along the side of the paper and draw a line. Repeat this on all four sides and you have a boarder. I’m not really worried about the exact dimensions at this point because I can always alter the final dimensions later (in the computer).
For this maze I am going to make a circular center zone that will contain both the entrance and exit to the maze. In this case I used a plastic lid to make the circle. I don’t a have complete idea yet as to the path the maze will take, so I just start making branches in different directions until something triggers an idea.

If you read some of my past blog posts (of course you did!) then you’ll know that when you make these kinds of mazes there will be main paths and minor paths. The main paths tend to be somewhat visible if you look close enough. So right off the bat you have to start planning your solution path to use both main paths and minor paths to throw off the maze runner. In practical terms this means leaving some open ends that you can come back to later and fill in. These will have the appearance of minor paths (because they will be boxed in my the main paths), but of course could include the solution path. Does that make sense?

Basically, the maze runner will tend to follow what looks like the main paths, so you have to be sure to use both the main paths AND the minor paths with your solution route in order to best throw off the mazer runner.
Once I’ve got most of the maze filled in, I want to start thinking about the exit. If you ever seen someone do a maze, you might catch them “cheating” by starting at the exit. While there is nothing you can really do about this (and who cares really?), I do like to scramble the exit of the maze a bit just so it isn’t too obvious from what direction the solution path is coming from. You can see in the picture below that I’ve drawn two paths leading out of the exit (the two squiggles lines coming out the right side of the center circle). This will at least give the entrance and exit the same visual look at first glance. Hopefully, but not likely, this will dissuade someone from starting at the exit. Regardless, this still makes the maze look more visually balanced in my taste.

Here we have the completed maze! If this was just for fun, the project would end here. If I really wanted to make something out of this maze, the next step would be to scan it into the computer (or photograph it and import the file) and then take it into photoshop in order to clean up any rough edges.
And that is it! A nice large maze ready to get lost in.
