Maze Design: Part 1
I first started drawing mazes sometime in middle school. Back then, I would randomly create the whole maze from start to finish. I would bounce back and forth between different paths – not having any real overall design or idea which path would lead to the finish. The results were uneven. Sometimes the mazes would be very complex, other times they would be easy, and most would fall somewhere in-between. The “easy” ones were the sticking point. It’s no fun spending time drawing a maze only to have it solved very quickly.
The logical solution is to design the main path for the maze first, and then to fill in the rest of the maze afterwards. This is a little trickier then it sounds, at least for the type of mazes I like to make, because if you draw the main path first it will tend to visually stick out from the rest of the maze.
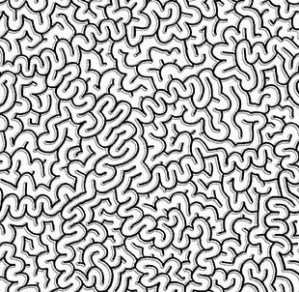
(Sample section of maze)

(same section with highlighted main path)
To hide this visual clue you need to plan the overall course of the maze on a separate piece of paper (or if the maze is small enough – in your head). This ensures that you can make “fake” main paths or at least double back some of the real main paths in order to hide them better.
There are many advantages to making mazes this way…
- You have complete control over how hard you want the maze to be. Easy mazes can be straight forward; while complex mazes can have as many twists and turns as you desire.
- It takes some of the pure randomness out of the maze. This might sound like a strange advantage, but I think the complete randomness of some mazes (like the kind a computer will often make) are incredibly boring. I have no desire to do computer generated mazes.
I’m going to talk about both of these points in future posts.
Thanks for reading!
